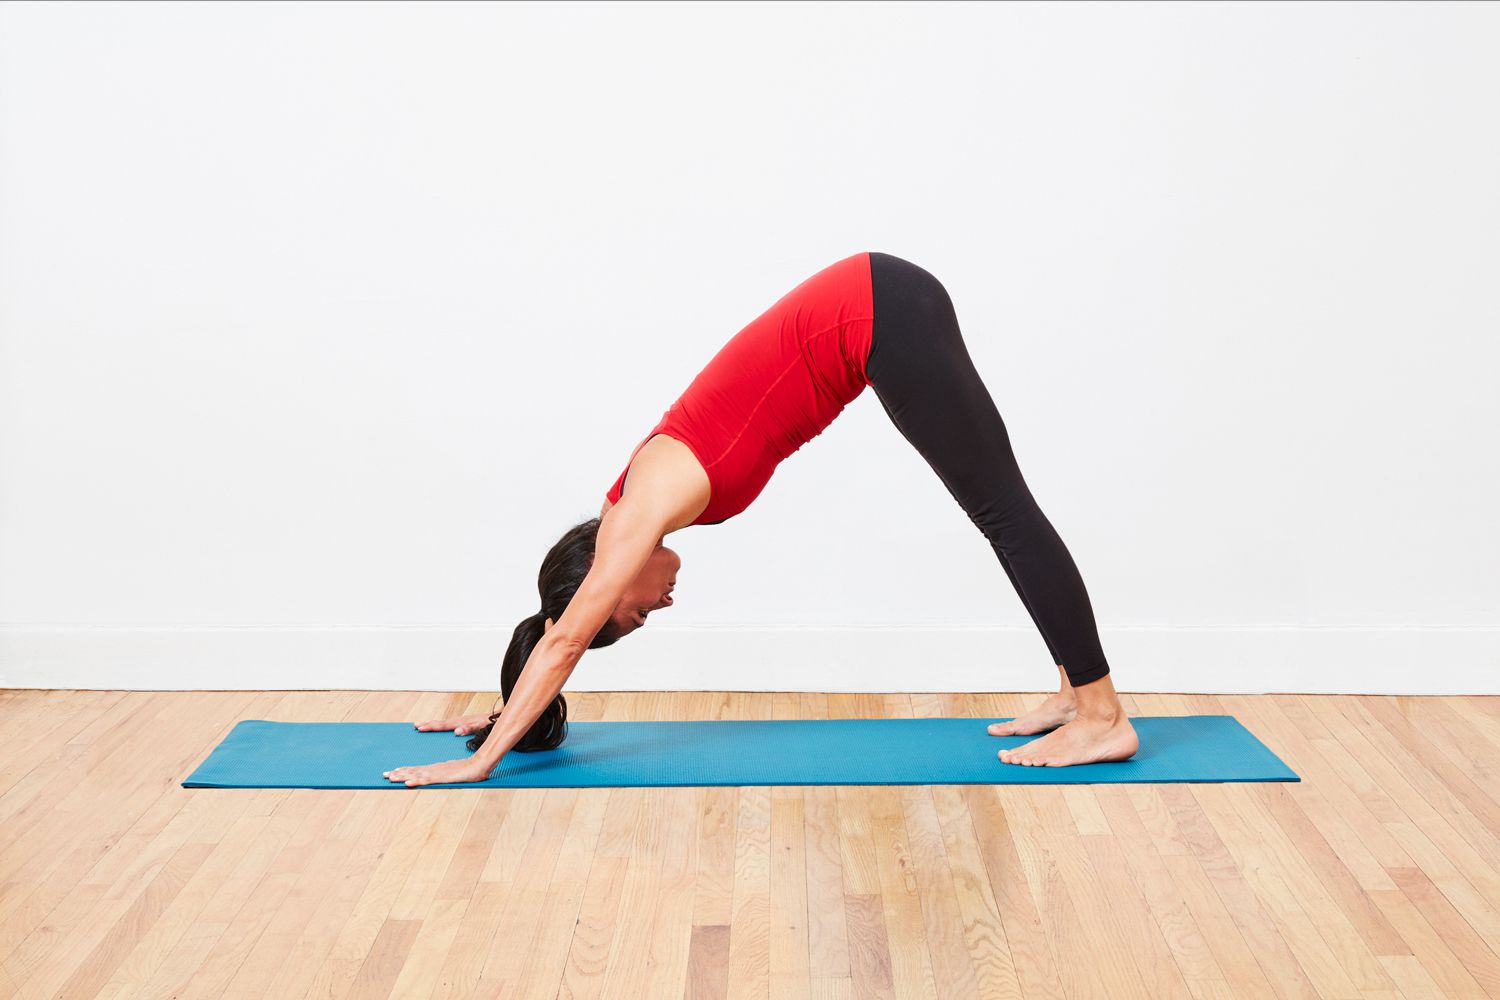
If you have participated in a yoga class or did yoga practice by following an online tutorial, you must have been told to perform Downward-Facing Dog (Adho Mukha Svanasana) or you must have seen it in a picture. And maybe after looking at that flexible instructor with an absolutely straight back, feet flat on the ground, and a calm smiley face, you copied that as well.
But what you experienced is not the calmness and groundedness you saw in the picture, instead you realized how much tightness you have in your hamstrings, your lower back is rounded like a scared cat and your wrists are being crushed with all this weight of yours.
Let's do this quick reality check and find out why you experienced all that discomfort:
Downward-Facing Dog is a deep and intense stretch for your hamstrings. If your daily routine consists of too much sitting or working a desk job, your hamstrings will become structurally shortened.
? If you try to do this pose by forcefully straightening your legs, it will not help you become a better yogi, instead it will cause strain in your lower back and might cause some injury.
In this blog we will discuss how to modify this fundamental pose in a way that it feels good to you, helps you build muscle and respect the current limits of your body, but first let's talk about two things about safety.
A Note on Structural Safety & Pain:
Before you think about trying any of the modifications to this pose, it is a great idea to listen to the signals of your own body, learn what your body is trying to tell you about your current condition.There is a huge difference between the mild discomfort of a muscle which is tight and a sharp, intense pain or burning or pinch pain sensations. Always check for things like:
? If you are feeling sharp painful sensations in your lower back, shooting sensations towards your legs or intense wrist pain while performing this pose, stop immediately.
? If you are dealing with chronic issues like herniated discs, hamstring tears,or carpal tunnel syndrome, we recommend that you must not do this pose, until you get a green signal from your doctor or a qualified physiotherapist.
Always remember, it's never a good thing to forcefully do something with your body to get in shape or lose weight etc that triggers your already existing health issues or make it worse.
The Golden Rule: Spine over Straight Legs:
Another thing which is necessary to consider before looking at modifications, we need to rethink how we define a “perfect” Downward dog.
The main goal while doing the Downward Facing Dog is keeping the flat feet, but lengthening the spine. A straight and elongated spine helps you in achieving decompression of your back and opens your shoulders. If you are experiencing the rounding of the back when you straighten the legs, you are defeating the entire goal of this pose.
WRONG: Straight legs + Rounded, straining lower back
RIGHT: Bent knees + Long, straight, decompressing spine.
3 Foolproof Modifications for Tight Hamstrings:
Try these variations on your mat and find out which one works the best for you. The one that makes your breath freely, effortlessly and make you hold the pose without any discomfort is the one for you.
1. The Deep Knee Bend (The Everyday Essentials Fix):
This is the most effective and absolutely simple adjustment for this pose and you can do it right now with ease.
How to do it: Take the normal Downward Dog position and after that lift your heels high off the mat. After that gently bend your knees, imagine that you are pushing your belly towards your thighs.
Why it works: When you bend your knees, it takes off the pressure immediately from your hamstring attachments. This adjustment will make your pelvis tilt towards the inside, and this subtle change will help you achieve the required straight line all the way from your hips to wrists.
2. The Yoga Block Elevation:
Elevating the surface where you place the hands makes a hell of a lot of difference when it comes to changing the geometry of your pose as a whole.
How to do it: Bring two yoga blocks and place them on top of your mat. Make sure that they are low or medium level of height. After you put the blocks at appropriate height, place your hands firmly on the blocks, and grip the edges lightly and then push back into the pose.
Why it works: When you place your hands at elevated level, you take off a significant amount of your body weight away from your upper body and make your legs hold that weight. It helps in decreasing the acute angle forming in your hip region, which provides instant relief to the intense pulling happening in the hamstrings.
3. The Wall-Supported Dog (Zero Floor Strain):
In case you are feeling extremely tight in your hamstrings and lower back, it's highly recommended that you skip the floor totally and do this wall assisted variation.
How to do it: Stand in front of the wall at a distance of two feet away from it. After you do that, put your hands flat on the wall at the level of your chest. Now start walking backward until your torso becomes parallel to the floor, forming a shape of “L” with your body. Make sure to keep your knees gently bent.
Why it works: When you do this version, you will get all the benefits of shoulders opening and decompression of your spine even with your tight hamstrings and there is no pressure on them because of gravity.
Pro-Tips to Protect Your Wrists and Shoulders:
When you have tight hamstrings, you will naturally feel like escaping the stretch and put most of the weight forward into your hands. This will make your wrist fatigue faster. So to avoid that always remember these questions:
? Claw the Mat: Don't let the weight be dumped into the heels of your hands. Use the claw, which means press down firmly through your knuckle and finger tips, that will help you in activating your forearm muscles.
? Rotate Your Armpits: Imagine you are trying to make your armpits turn in a way that they are facing each other. This will help you achieve the outward rotation in your shoulders, generating a wide, stable base across your upper back and keep your neck totally free from the pressure you might experience if your upper back is not engaged.
A Quick Daily Progress Routine:
If you want to slowly increase the flexibility of your hamstrings by using this pose, don't just stay still, unmoving in it. Try “pedaling your feet."
1. Push back into Downward Dog by keeping both of your knees deeply bent.
2. Keep your left knee bent and slowly start to press your right heel in the direction of the mat.
3. Switch sides: Bend your right knee this time and gently melt your left heel down.
4. Alternate back and forth in a smooth relaxed manner for 5 to 10 breaths.
Listen to Your Body
Yoga is not a practice of performance like gymnastics; it is an art of self-awareness. If you are experiencing that your heels always stay three inches off the floor and it remains like this for the next five years, your body will still thank you because it's still getting all the advantages of the pose.
Never rush to extend your legs, keep your knees bent, lengthen your spine, and let your breath be your guide and instructor.